
So! You thrashed your hardwood floor this winter or maybe tired of that wet carpet from all that snow??! Don’t know what to do???
How about if we put in a new wood floor right now? No problem! Then you will be ready for that spring fling!
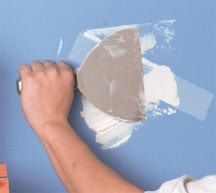
Wood flooring has such warmth and the durability is actually misleading. You can repair physical damage to your wood floor fairly easily. Cracks and holes can be patched. If the edges start splintering you can re-glue them. Should the damage be too extensive, you can always replace one or more boards to replace the damaged area. So, get yourself out and decide which style you like and let’s start!
Special Tip: Your new wood will need to acclimate itself to the differences in the moisture levels of your house. It must be brought home and set in a corner of the room in which it will be installed. Open boxes and stack planks loosely. This acclimation usually takes one to two weeks. Wood expands and contracts dependent upon the temperature and humidity. To ensure a perfect fit, give the wood time to do this BEFORE you install. You will be glad you did!
Tools:
Tape Measure
Handsaw
Pry bar
Circular saw
Nailset
Drill w/ bit set
Pneumatic or manual floor nailer
Hammer
Materials:
Hardwood flooring strips
Flooring nails (per manufacturers’ directions)
Building paper or foam underlayment (look at manufacturers’ directions for specifics)
Carpenters glue
Safety tips:
Be sure you are not working around children with the saws.
Be sure your saws have safety guards and make sure they work.
Watch your fingers at all times when using power tools of any kind.
Step 1: Remove the old flooring down to the subfloor. If it is dry and in fairly good shape, lay building paper over the subfloor, overlapping 3” at the seams. Tack it down and mark the joist locations on the paper. If the new floor will be a floating floor, roll out foam backing and secure with masking tape, also marking the joists.
Step 2: Now you may begin your installation. Starting against the wall, lay your first plank and predrill nail holes through the flooring where joists were marked earlier. This will prevent splitting the new floor boards, which are fairly delicate. Set your planks the length of the wall, leaving approximately ½” clearance from the wall. This will allow for seasonal expansion.
Step 3: Once you are several strips away from the wall, you can use the special flooring nailer ( which we just happen to rent at J’s!!! Wow!! We have it all.), to continue installing the floor at a much faster pace than the predrilling method. It actually holds each piece tight against the last, and when struck with the mallet, will secure each piece with a nail. With a pneumatic nailer (air assisted) most of the work will be done for you. Before you set each plank in place apply a thin line of carpenters glue to the grooved end of each piece. (Glue the tongue and groove sides if you are installing a floating floor.)
Step 4: When you get to the end plank on the first run, cut a piece to fit with tongue towards the wall. Then install so that the cut end will be against the wall. If you are using a hand saw cut with the decorative side up, with an electric saw decorative side down to eliminate damage to the finish.
Step 5: Begin your second row with a small piece 8” or larger in order to stagger end joints. You may use the short piece from your last cut. Tighten up your joints by using a small piece of plank as a buffer and tap the ends of plank with a hammer to the already installed plank. Use a coping saw or a jigsaw for cutting corners or other cutouts.
Step 6: Continue in this manner until you have reached the last plank. When you reach the last plank, you may have to cut it lengthwise. Lay the last plank on top of the next to the last row with the edge against the wall. Use another piece of planking as a guide to scribe the contour of the wall. Cut along the scribed line. Then install your last piece. Use a wood block to protect the wall and a pry bar to wedge that last piece in tight. This last course of boards more than likely will have to be face-nailed.
Step 7: Allow the glue to dry for 12 hours before using your new floor. If there is any excess glue on the joints, use a solvent to remove. Read the label to be sure it is wood safe.
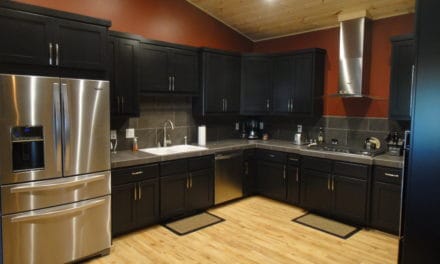
Look how beautiful it is!!! Put on a good pair of wool socks, invite the neighbors and have sock races on your new hardwood floor!!!
If there are any projects you have in mind, call us at J’s Rental @ 530-832-5462. We are soooo happy to help you achieve your goals when it comes to beautifying your home!!!
Meet you here again next time!!


