Like Living On Vacation Year ‘Round Local Palapa Bar
By Melissa Wynn When you have a favorite vacation destination that you visit every chance you...
Read More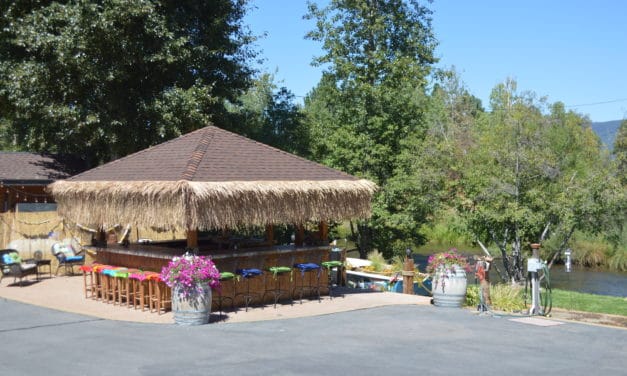
By Melissa Wynn When you have a favorite vacation destination that you visit every chance you...
Read More
From Matt and Jamie at SIERRASCAPES Landscape Design Now that the summer sun begins it slow...
Read More[media-credit name=”Jeanne Brovelli” align=”alignright” width=”300″][/media-credit] Feather Your Nest with the Colors of Fall by Jeanne Brovelli, Interior Re-designer La Casa Bella Fine...
Read More
Burglar Proofing Your Home By Koda Steinbeck Ask yourself: how easy would it be for you to get...
Read More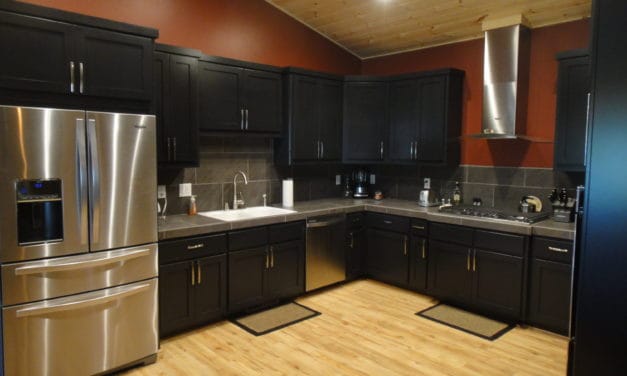
House Of Custom Cabinets- Building It Your Way When building or remodeling your home, the...
Read More